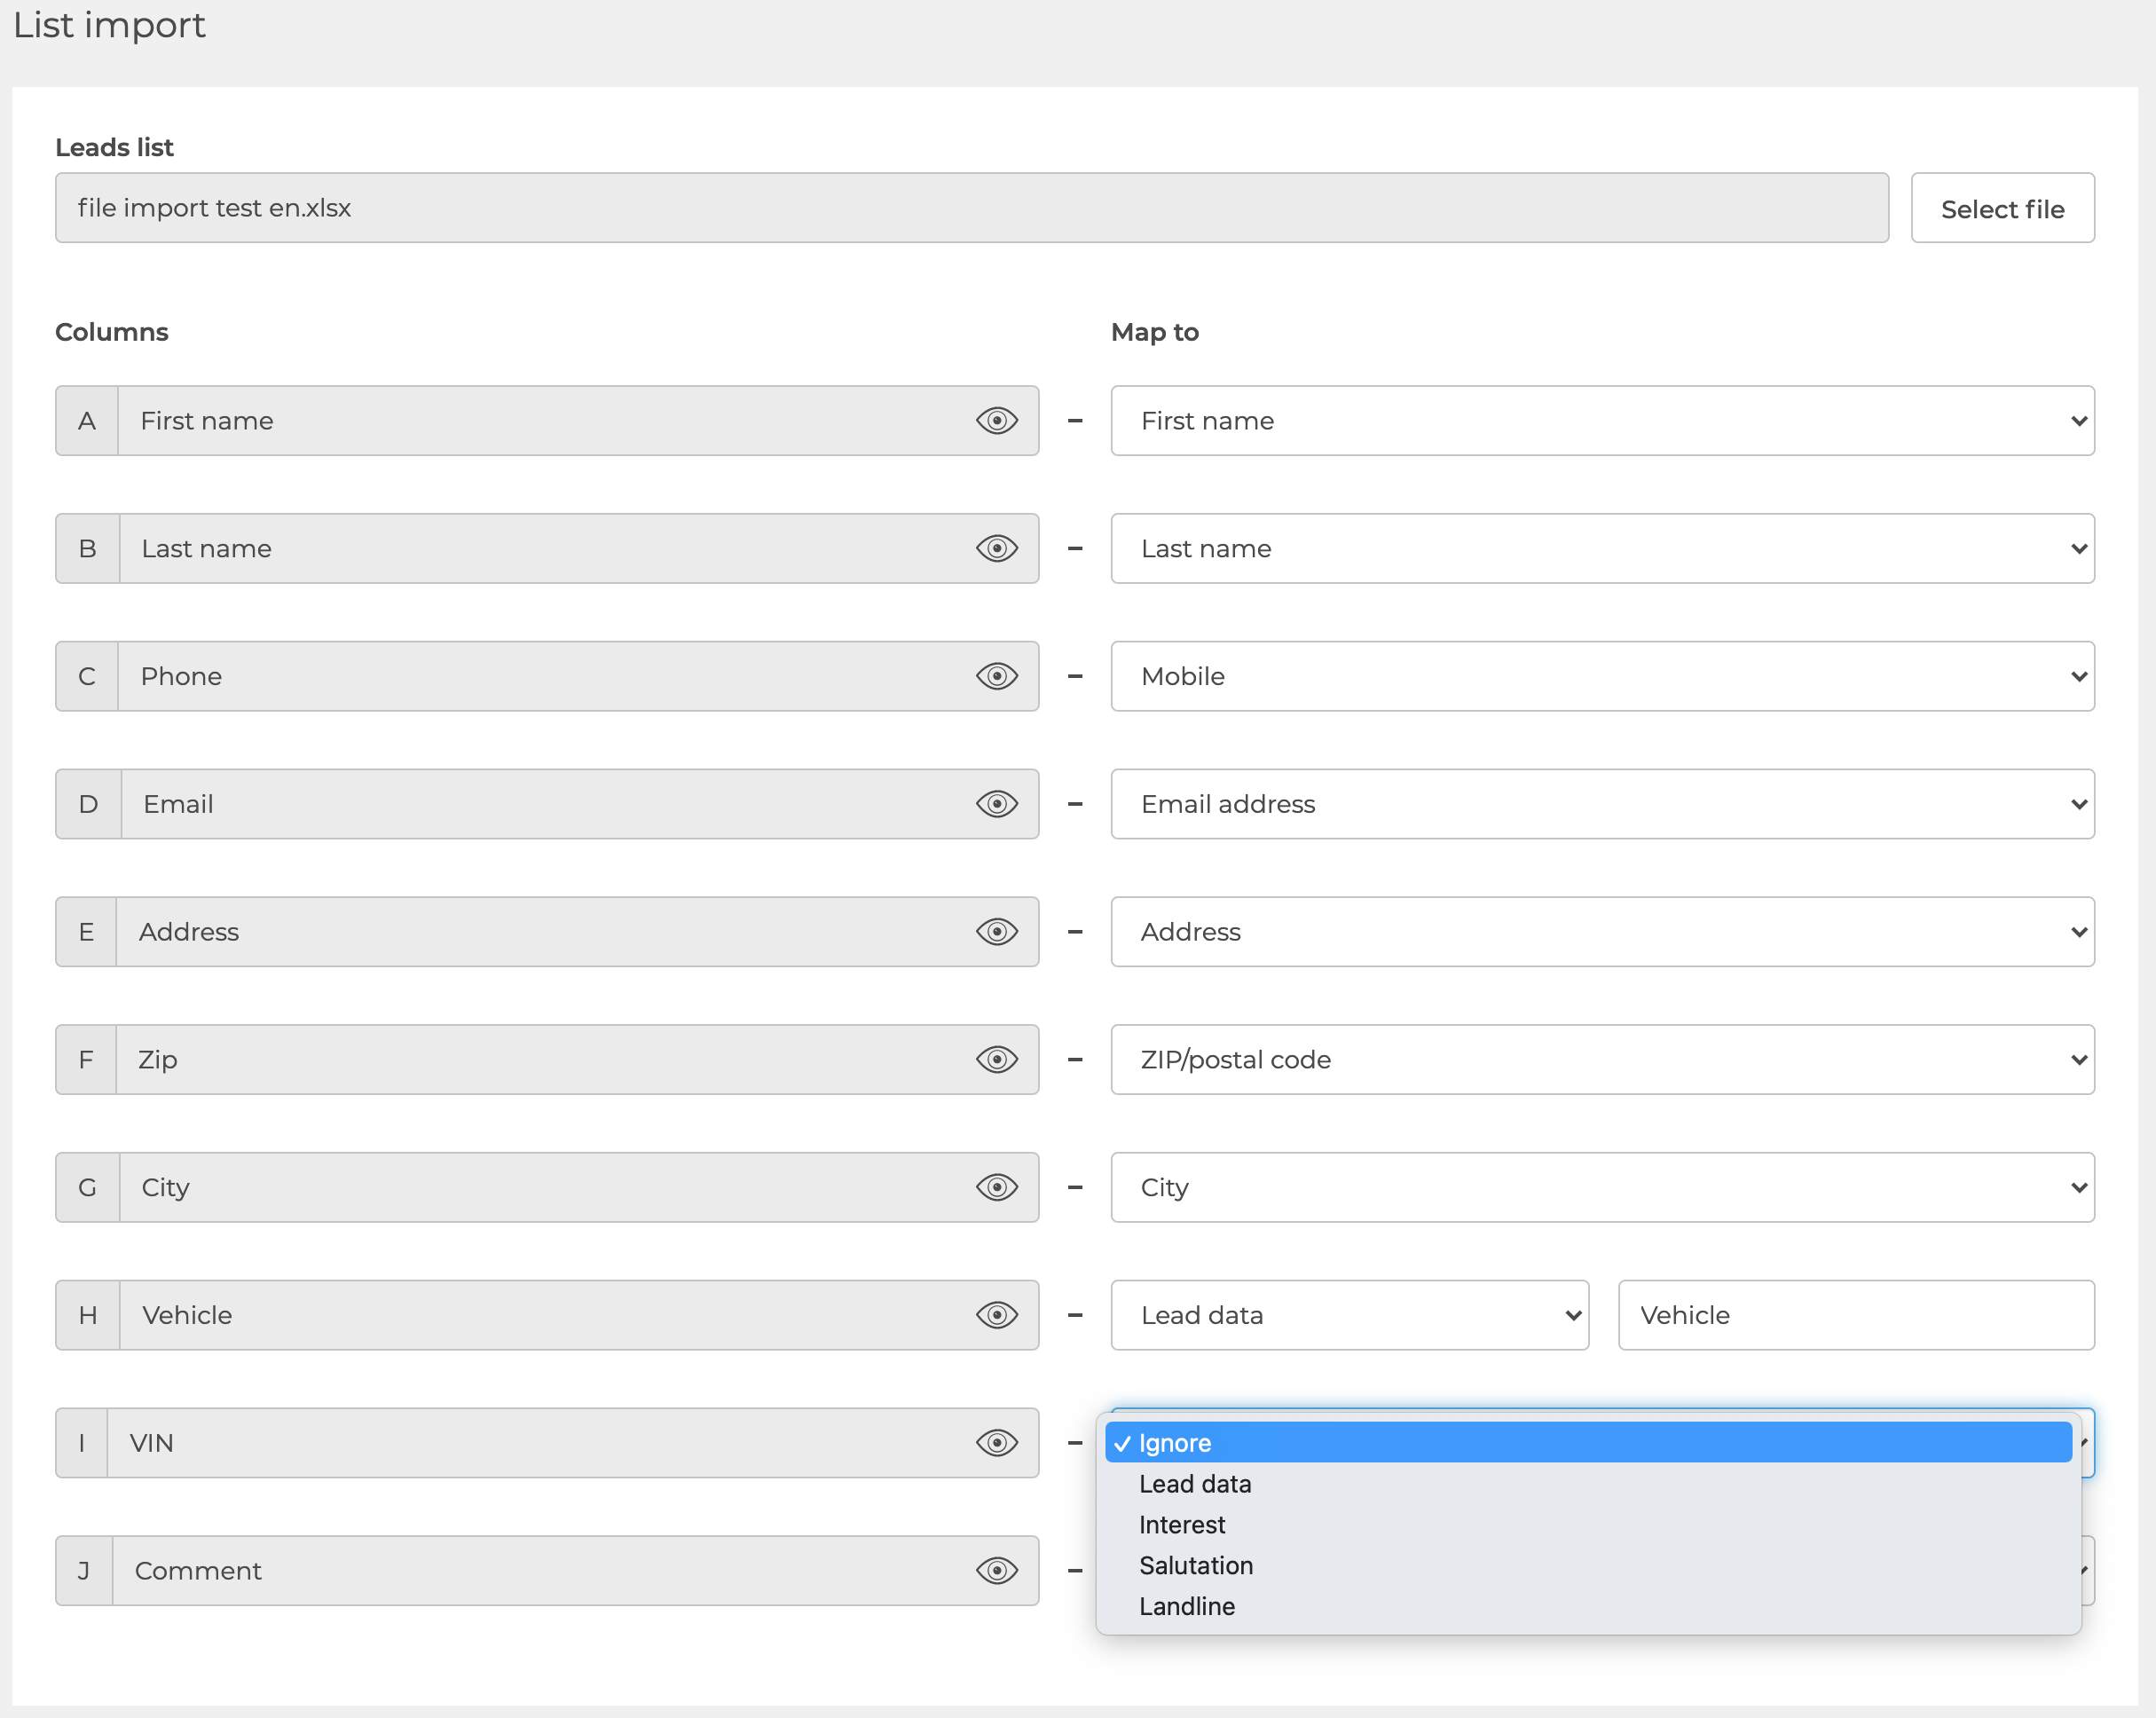
This article will explain, how you can import leads into EASI'R with the help of xlsx-files. Before a file can be imported, a mapping has to be created so that EASI'R can interpret and display the data from the uploaded files correctly.
- As a team admin or admin, go to Settings - Integrations - Files
Step 1: Mapping
File details
- Click "Create" to create a new mapping
- Enter Name, Source (e.g. mailing list, website signup, etc.), and Lead type (had to be configured before hand)
- Decide if the uploaded files will include B2B or B2C leads
- Enter fallback email address (If leads cannot be imported for whatever reason, they will be sent to this email address instead)
Mapping
- Click "Select file" and find xlsx-file on your computer
- Map all columns from your file (left) to a corresponding value in EASI'R (right), so that EASI'R can interpret and display the data correctly
- Either full name or first name and last name have to exist

- Use the option “Lead data” for any information that cannot be mapped to a field in EASI’R. Those will be shown in the lead details overlay. When selected, you can specify the label that is used to show this information.
Use the option “Ignore” to disregard entire columns of the source file. Data in those columns will not be imported. - Adjust import settings
- Click "Create"
Step 2: Import
Now your mapping has been saved, and you can continue to the second part: Uploading the file
- Find the mapping you just created under Settings - Integrations - Files and click "Import"
- Click "Select file" and find xlsx-file on your computer
- Click "Start import"
- The import starts and you will be notified via email, when it is completed.
Note: The next time you want to import a file with the same structure (i.e. the same columns and settings), you do not need to create a mapping, but only need to perform step 2.