A contact is a customer, a person that you are in contact with. If you want to learn more about what a contact is and about the different contact types in EASI’R, click here.
There are three ways a contact can be created:
- By accepting a lead from a new customer. Read here how to work with new Leads.
- If you have other systems integrated into EASI’R, contacts might also be imported and/or synchronised from these systems.
- Through the manual creation of a new contact.
Create a contact manually
The manual creation of a B2B or B2C-contact can for example be needed when a customer comes to your dealership in person (‘walk-in’) and you do not get his or her information through a Lead.
There are several starting points from where it is possible to create a new contact. You can find the ‘New contact’ button on the following pages:
- On your EASI'R dashboard (click logo in top left corner to get to dashboard)
- Main menu -> ‘Contacts’
- For B2B only: On the page of each account
To manually create a contact, click ‘New Contact’ on either of these sites. You will be forwarded to the contact creation page, where you can fill in all the information you have. By default, a new contact is always set to be a private (B2C) contact. If you want to create a business (B2B) contact, select the checkbox ‘Is it a business contact?’ on the top of the page.

Note: When creating a B2B-contact from a B2B-account's page, this box will already be checked and the B2B-account will be automatically pre-filled.
Depending on whether you are creating a private or business contact, the form you need to fill in differs:
- Private contact: Simply fill in all information, scroll to the bottom of the page and klick ‘Create contact’.
- Business contact: When creating a business contact, an account is required. The account is the company the contact works for. Simply type in the name ofthe account in the corresponding field. If the account does not exist yet, you can create it here by typing in the name and clicking
. You can later edit this account. After filling in all the information available, scroll to the bottom of the page and press ‘Create contact’.
- Note: Contacts can also be created directly from an account’s page - simply click on the ‘Add contact’ button.
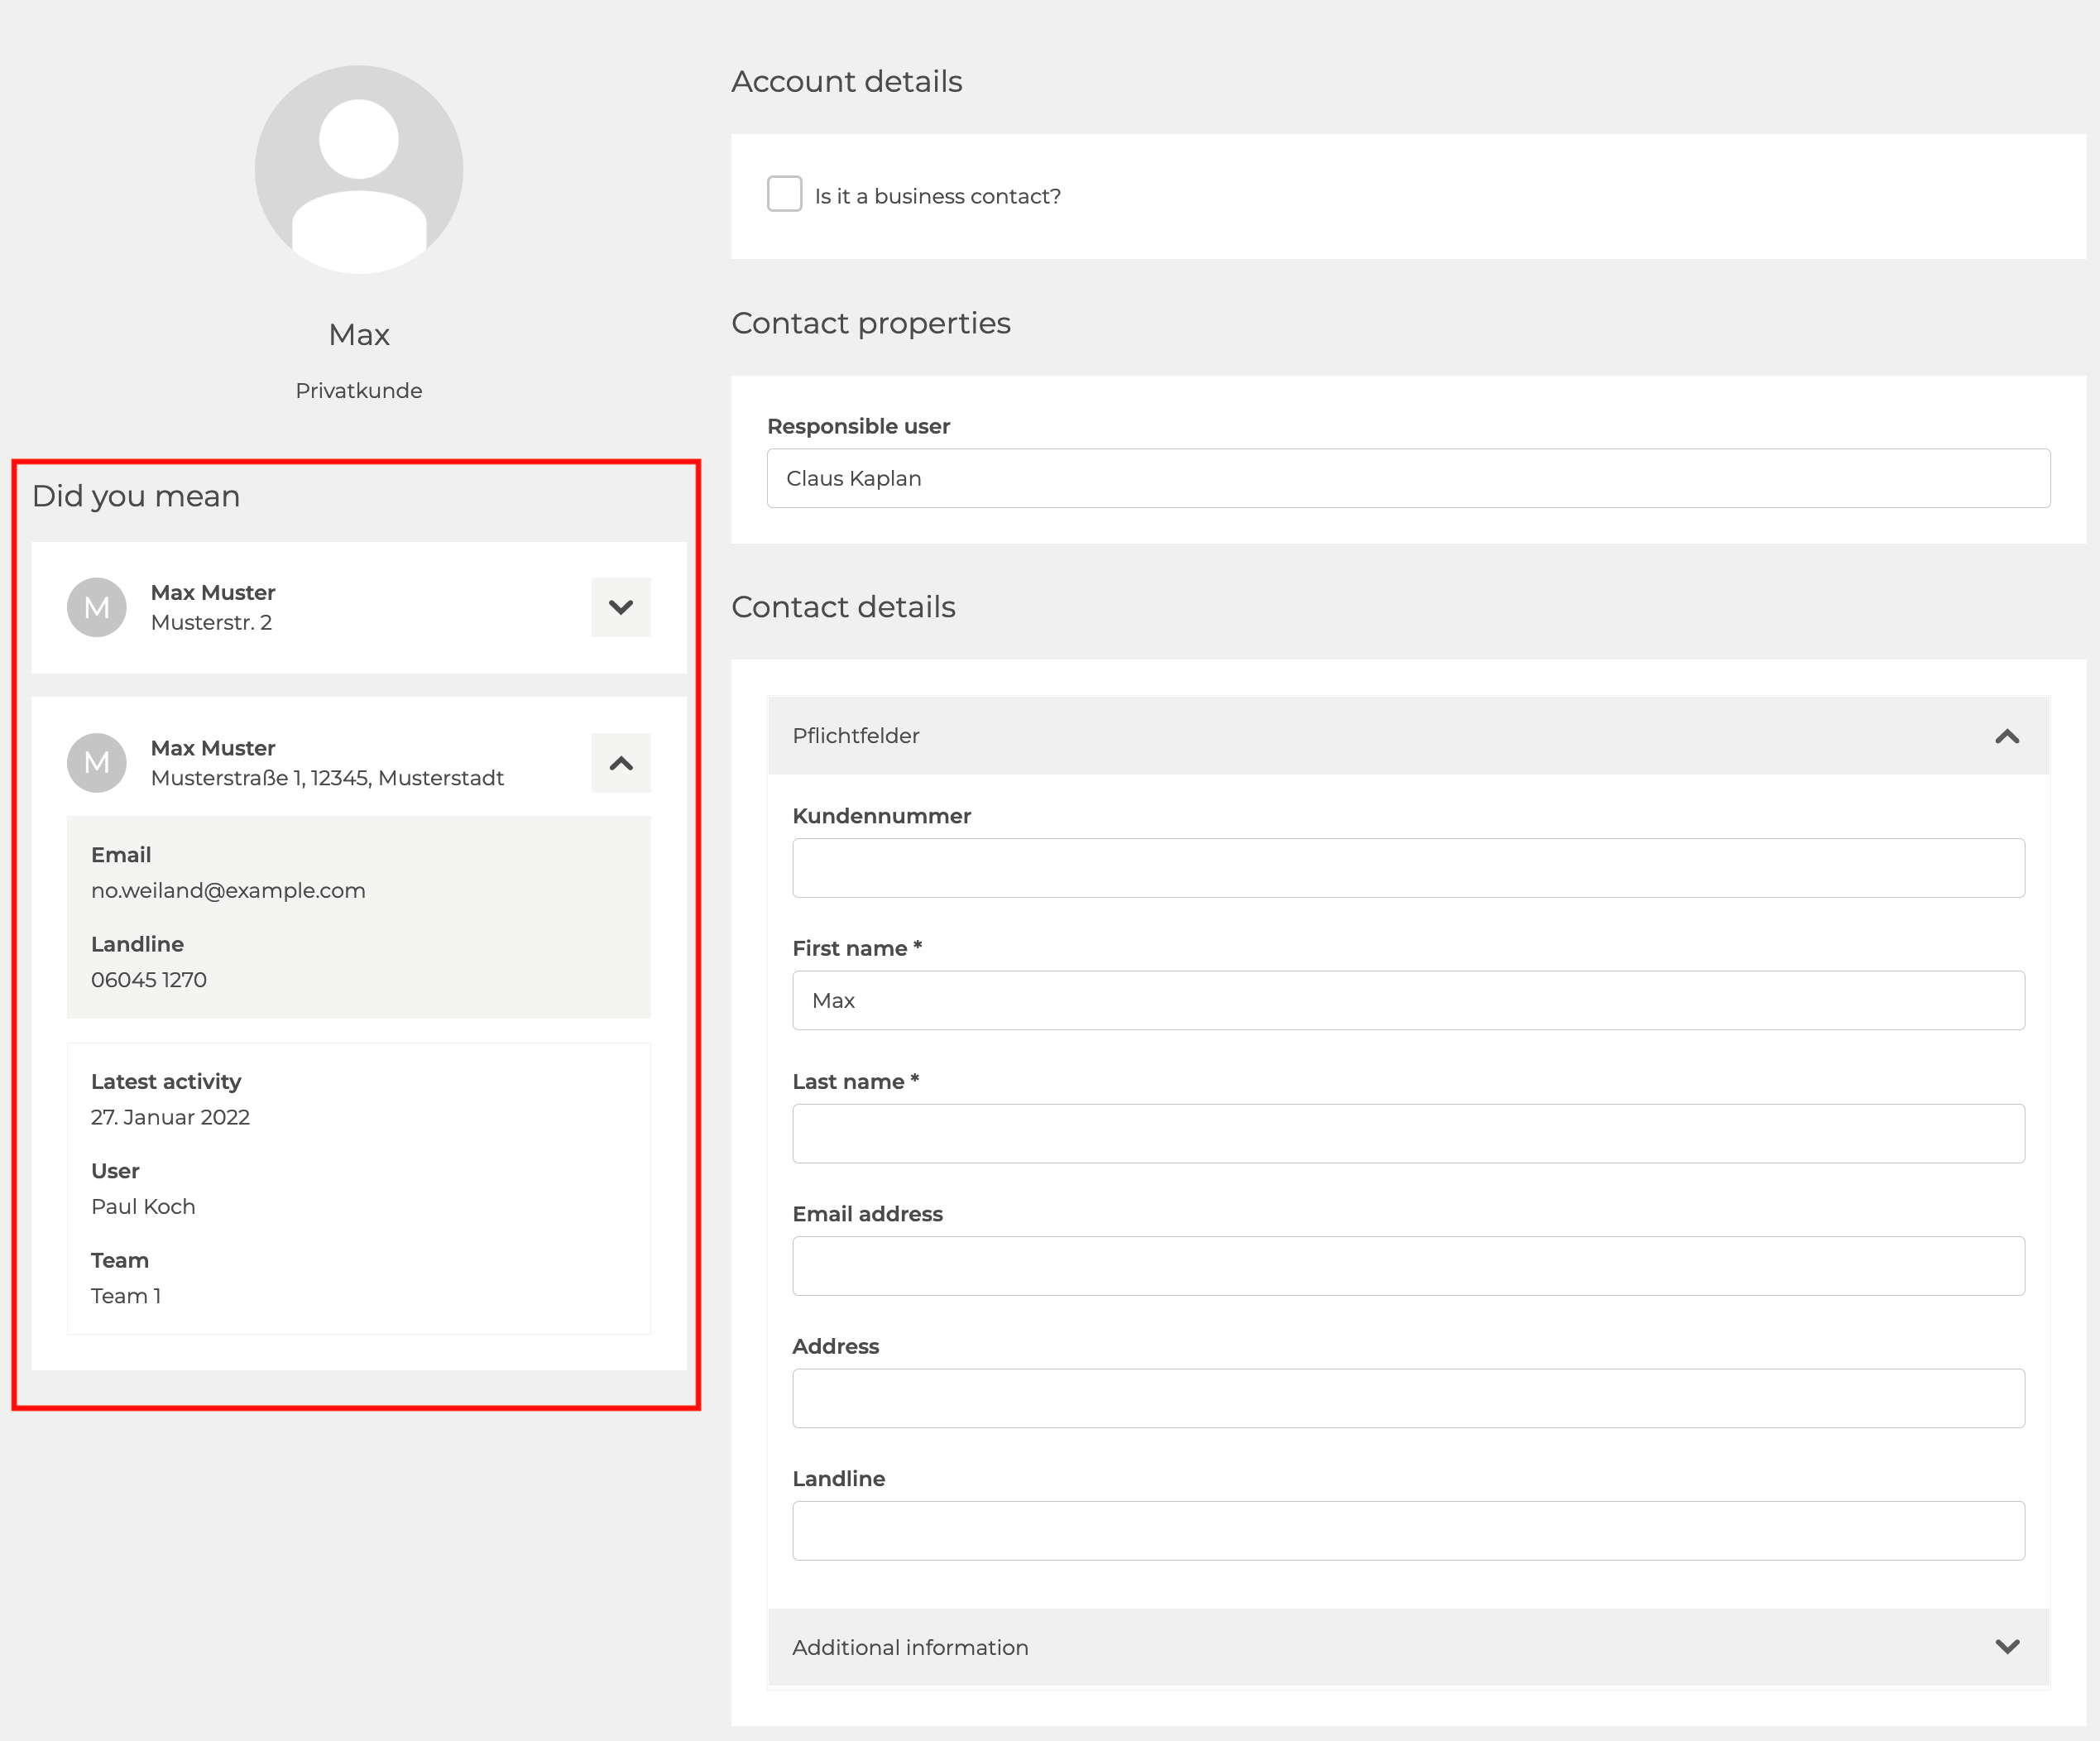
Note: Pay attention to the left side of the contact creation page. If you are about to create a contact with a name that already exists in the system, this existing contact will be shown on the left side. This is to prevent you from creating duplicates. If the contact on the left is the same as the one you are about to create, simply click on the name to access the contacts' page.

Edit or delete a contact
If you want to edit contact information, you first need to find the respective contact. Click on the contact to get to the contact overview. Click 'Edit' in the top right corner.

When you are done editing, click ‘Save contact’.
Depending on your rights, you might also see a ‘Delete contact’ field here. Please be aware that deleting a contact also deletes all cases of this contact.