If you don't know how to find your leads, click here.
Before accepting a lead, take a look at the Lead details to make sure to see all available information. Once accepted, a lead cannot be rejected!
To accept a lead, click the accept icon ( ![]() ). An overlay will open, showing the lead acceptance flow:
). An overlay will open, showing the lead acceptance flow:

There is a maximum of three steps to take in order to accept a new lead.
- Choose account: EASI’R will compare the lead data with all existing accounts. If there is a 100% match between the account in the lead and an existing account, that existing account will be selected. If there are similar accounts, EASI’R will present you a list of those similar accounts. You can either select one of those or create a new one. If the account in the lead doesn’t have any matches or similarities with existing ones, a new account will be created automatically.
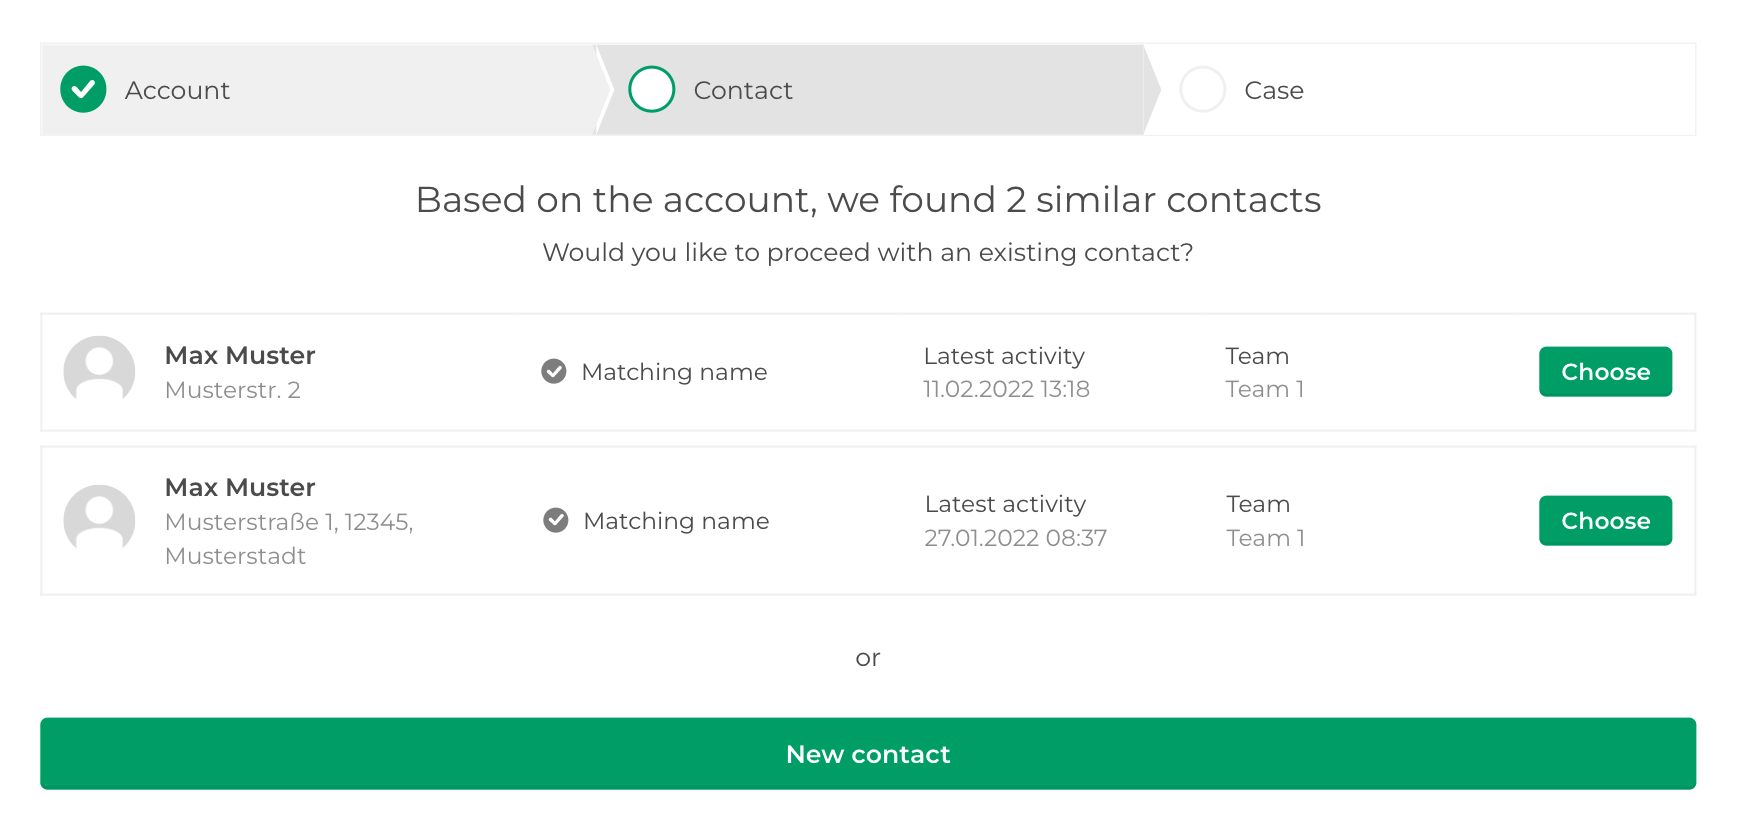
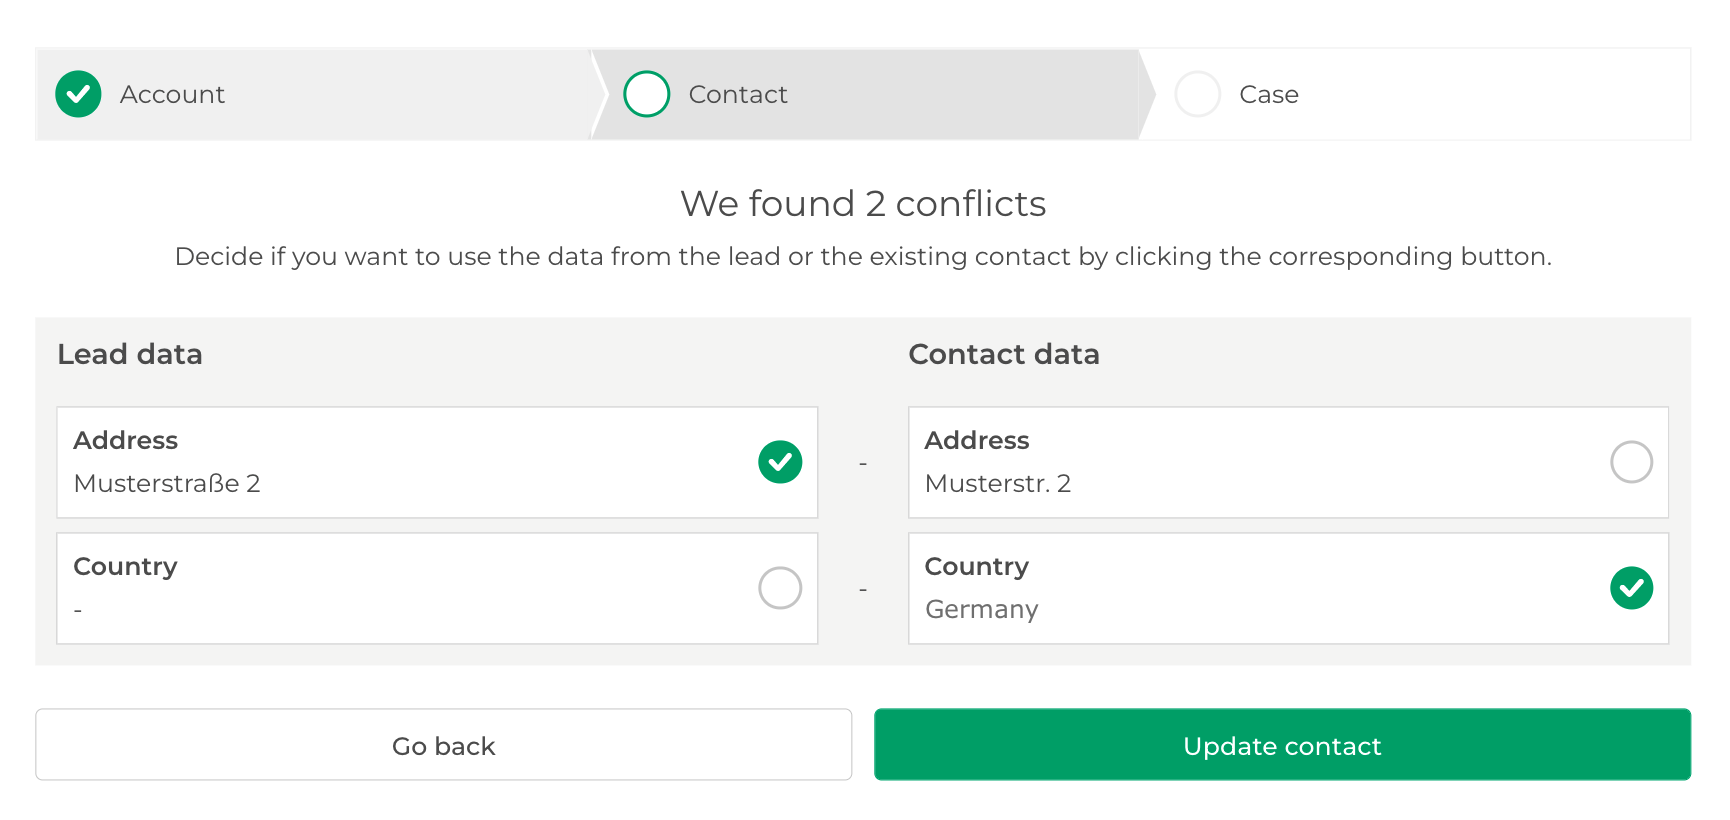
- Choose contact: The same happens with contacts: If there is a 100% match between the contact in the lead and an existing contact, that existing contact will be selected. If the contact in the lead doesn’t have any matches or similarities with existing ones, a new contact will be created automatically. If there are contacts that are similar, EASI’R will present you a list of those similar contacts. You can either select one of those or create a new one, if the existing ones don't fit. If the contact already exists in EASI'R, but some of the contact information in the lead details are different from what exist in EASI'R, you can choose if you want to use the Contact data or Lead data.
- Create case: The only thing left to do now is to choose a relations path (only if you have more than one to choose from), and a case manager (the active user will be selected by default). If there is an open case to the chosen contact, you now have to option to add this new lead to the existing open case. Now you can click ‘Create case’.
Click here, to learn how to reject a lead.
You can also watch our video about lead acceptance.